System Configuration Menu
The left side of the L@ti-View screen contains a user-dependent configuration menu. The following shows the buttons allowed for a full access user.
2D GUI
Refer to 2D GUI Editor Mode for complete information about this option.
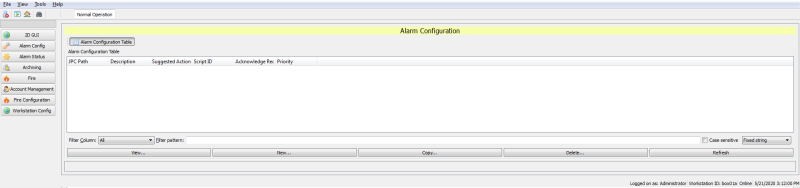
Alarm Config
Alarm Config opens the alarm configuration table, where the alarms can be created, copied, deleted, and filtered.
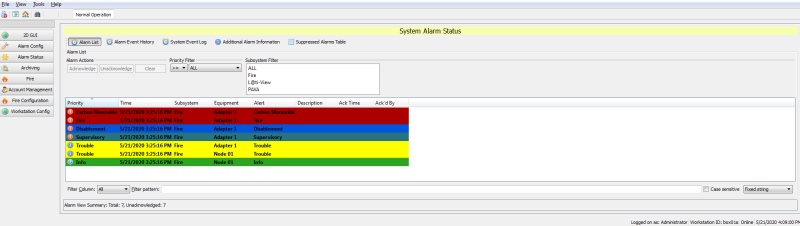
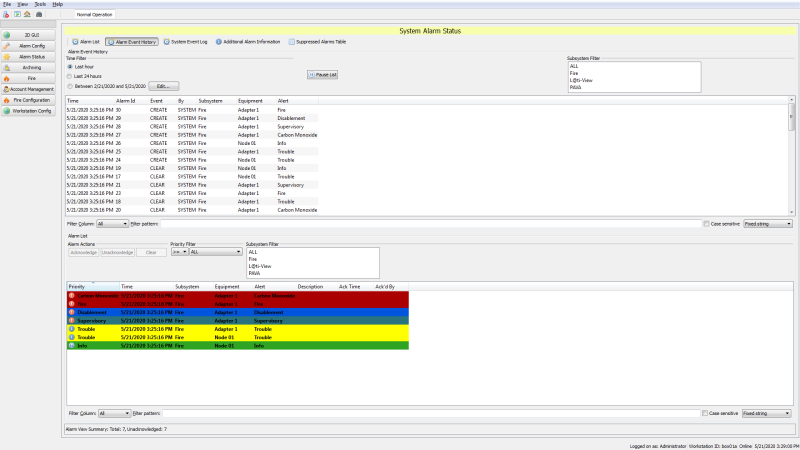
Alarm Status
The Alarm Status tab provides access to the following views:
- Alarm List
- Alarm Event History
- System Event Log
- Additional Alarm Information
- Suppressed Alarms Table
Alarm List
The Alarm List is the default view when selecting the Alarm Status tab. This view displays filtered results using buttons, drop-down menus, and column headers.
Alarm Event History
This button opens a page that organizes and filters the Alarm Event History using column sorting, drop-down menus, and various filters.
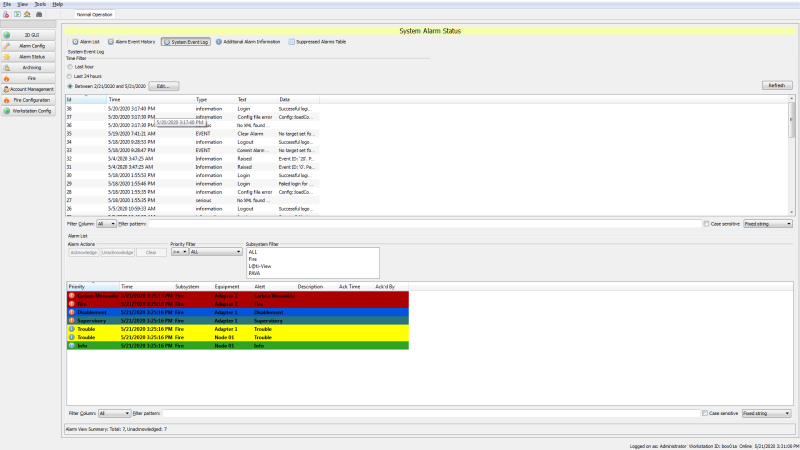
System Event Log
This organizes and filters the System Event Log using column sorting, drop-down menus, and various filters.
Additional Alarm Information
The Additional Alarm Information tab organizes and filters additional alarm information using column sorting, drop-down menus, and various filters.

Suppressed Alarms Table
The Suppressed Alarms Table tab organizes and filters the suppressed alarms table information (if any) using column sorting, drop-down menus, and various filters.

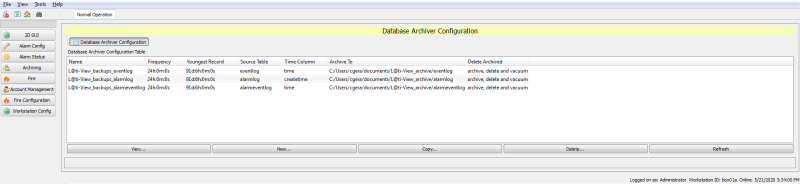
Archiving
The Archiving tab allows the user to view, create, copy, and delete a Database Archiver Configuration. L@ti-View will automatically convert any frequency over 24 hours to days and hours.
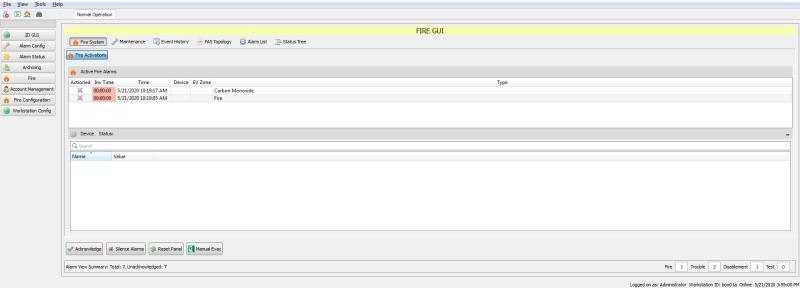
Fire
The Fire tab provides access to the following:
- Fire System
- Maintenance
- Event History
- FAS Topology
- Alarm List
- Status Tree
NOTE The Fire tab defaults to the Alarm List upon opening and synchronizes every 10 seconds.
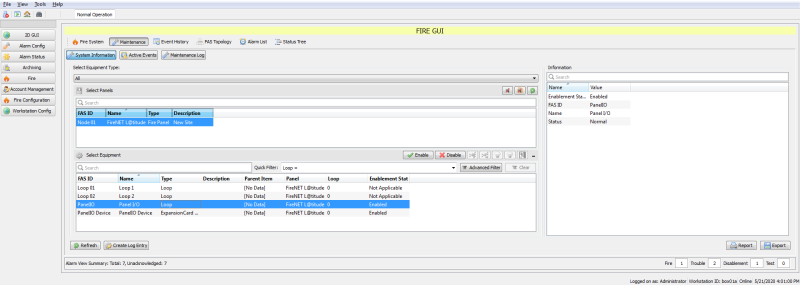
Fire System
On the Fire System page, report styles can be selected, acknowledged, and printed. There is also a visual representation of the selected zone, with options to move or resize, and the ability to move up, down, left or right to see different evacuation zones.
Maintenance
The Maintenance tab displays all of the nodes in the configuration. Selecting a node from the list will populate the Equipment list on the bottom of the screen. Upon selecting a device, the following options are available:
- Enable selected device
- Disable selected device
- Start polling a selected device
- Stop polling a selected device
- Operate selected equipment
- Restore selected equipment
Selecting at least one item from the Equipment list enables the Enable / Disable buttons or allows the user to manually create a Maintenance Log entry.
When selecting any of the above options, a window will appear requesting a reason why the action has been done. At least one character must be entered to proceed.
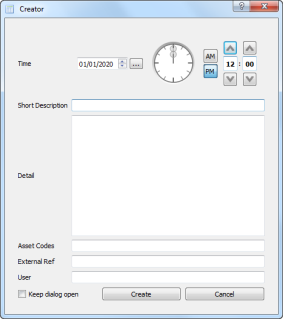
Maintenance Log
|
To create a manual maintenance log entry,
NOTE Asset Codes cannot be added when creating an entry, but can be edited later by double-clicking the desired entry and making any needed changes. |
|
To export a maintenance log file to a .csv file (which can be opened in Microsoft Excel or Google Sheets),
- From the Fire tab, select Maintenance > Maintenance Log.
- Click Export at the bottom (or right-click and select Export...).
- Enter a file name and select a location.
- Click Save.
To create a maintenance log report,
- From the Fire tab, select Maintenance > Maintenance Log.
- Click Report at the bottom.
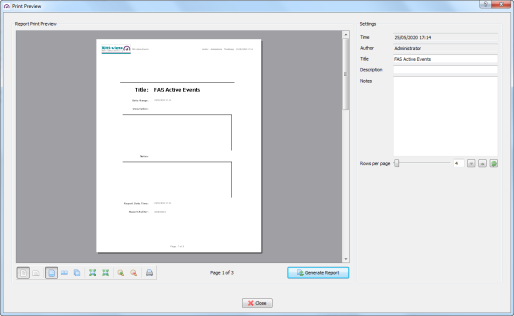
- Enter the report details and use the icons to change the layout as desired.
- Click Generate Report.
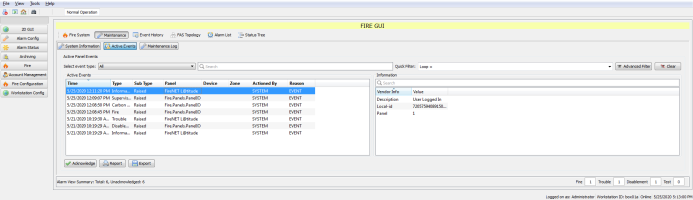
Active Events
From the Fire tab, select Maintenance > Active Events. Active events can be filtered by specific event type, Quick Filter, or Advanced Filter.
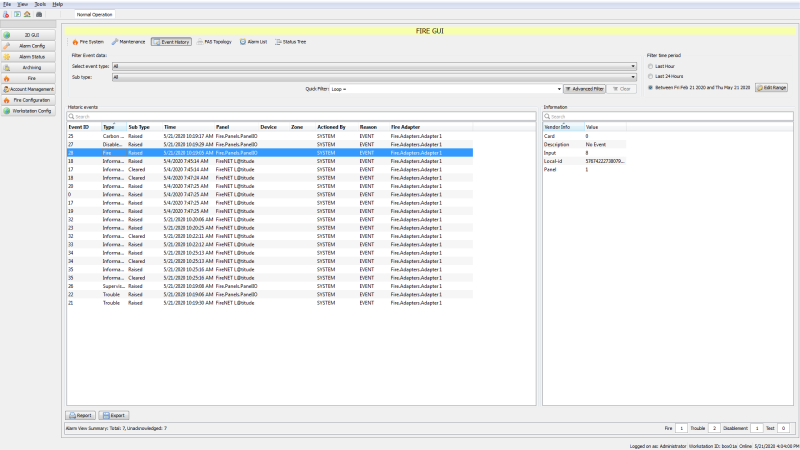
Event History
The Event History page shows all historic events with additional information (if available). The history can also be used to create reports or exported as a .csv file.
The Event History can be very long and detailed, so authorized users can view and/or rearrange it by:
- quick filter (e.g., Loop)
- clicking column headings
- changing time/date periods
- choosing event type and sub-type
- using an Advanced Filter tool (i.e., drop-down menus for Columns + Operands + Data)
L@ti-View reports allow both simple and advanced searches to narrow down a specific data type or series. Advanced filtering can use column headings with boolean expressions plus free-text data:
- = equal to
- != not equal to
- > greater than
- >= greater than or equal to
- < less than
- <= less than or equal to
- Like...
Only one filter term can be used.
EXAMPLE [Zone = 2] would show only events that are listed for Zone 2, whereas [Zone != 2] would show all events except those in Zone 2.
Fire Alarm System (FAS) Topology
The FAS Topology page lists all connected devices and shows their current Status and Operational Status. The classes can be expanded or condensed by clicking the + or - icons.

Alarm List
The Alarm List page opens a list of all the alarm events, with an itemized summary of alarm types at the bottom of the screen.

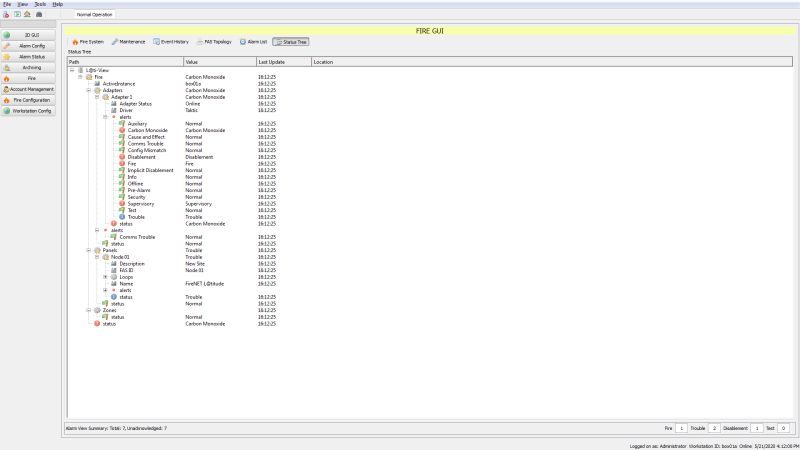
Status Tree
The Status Tree page opens an expandable tree layout of the network and attached devices. Use it to see the current status and alert types of any listed item.
NOTE The values are controlled by the item type; some will return three values while others will return seven.
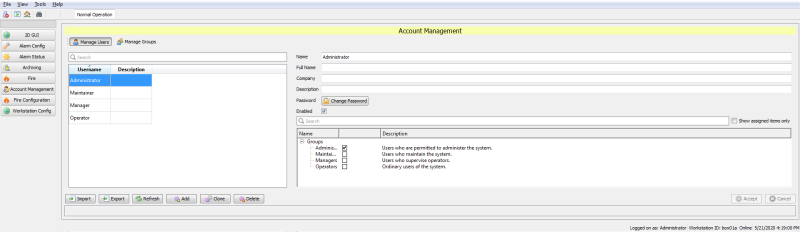
Account Management
The Account Management tab allows the management of all user accounts, permissions, and passwords. Frames and columns are resizable to enable easier reading of long descriptions. For more information on managing user accounts, refer to Accounts and Access.
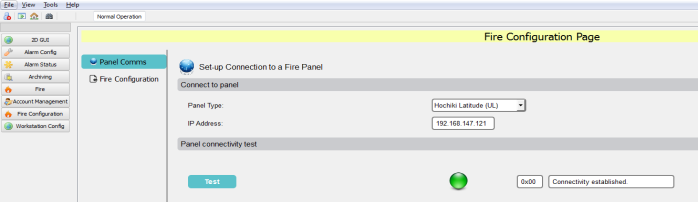
Fire Configuration
The Fire Configuration tab has two tabs - Panel Comms and Fire Configuration.
Panel Comms
The Panel Comms page controls the panel, panel communication type (IP or Serial port), and it allows a communication test.
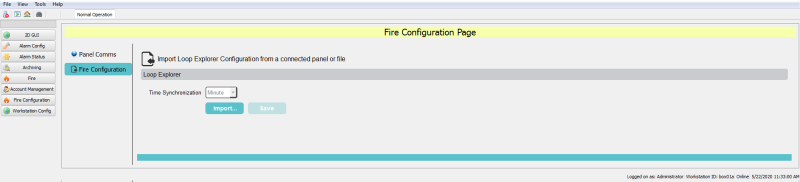
Fire Configuration
The Fire Configuration page allows a user to import a configuration file from LE2.
Workstation Config
The Workstation Config tab allows authorized users to access many configuration options, as shown in the left-hand menu below.
WARNING! Workstation configuration changes can have serious consequences that could affect the L@ti-View system’s functionality or security.
To allow configuration recovery, export the current configuration or the entire project before making any configuration changes.
WARNING! Due to the potentially adverse consequences of experimenting with live systems, it is recommended that Demonstration mode be enabled for training or project creation scenarios.
Always import or reload the Operational configuration or project when finished.
WARNING! Workstation configuration changes can be made in Control Mode or Editing Mode, so Operational configuration changes should be restricted to specifically authorized persons only.
NOTE Configurations and projects are not the same thing. A typical configuration file export is about 12 Kb, while an exported project folder holds many files.
Training and development projects can be exported, and then imported if they require further work. Although it is not recommended, configuration files can be directly edited at the source using an appropriate text-only editing tool.
General
Use this tab to add a site name to the project.

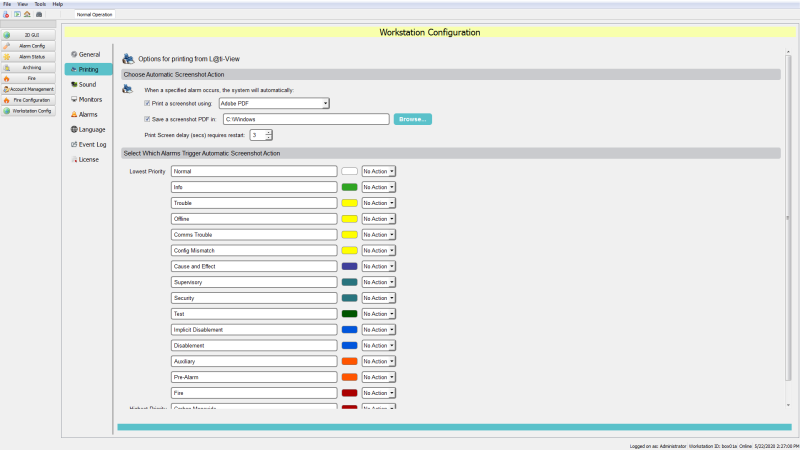
Printing
Use this page to change or confirm the L@ti-View default print settings. The printer drop-down menu shows the printers already installed on the workstation.
NOTE Choose Print a screenshot to automatically print screenshots of specified alarms for emergency responders, or Save a screenshot PDF to save a PDF of the screens.
Sound
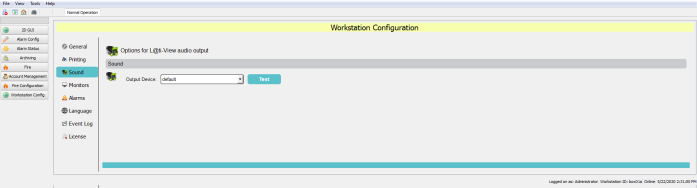
For audible warnings, select the output device from the drop-down list. Click Test to verify the output.
Monitors
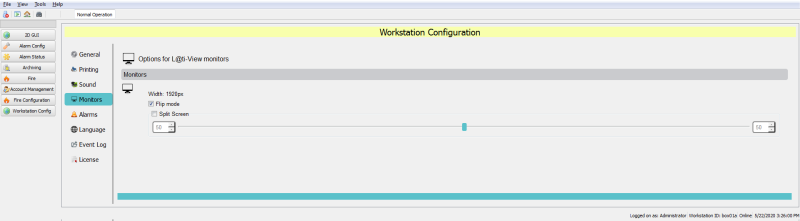
Use this page to change or confirm the L@ti-View monitor settings. Select Split Screen and move the slider to control how much of the available monitor screen width is used by L@ti-View.
Alarms
Use this page to configure the L@ti-View alarms. Alarms are organized in order of priority and Alarm labels and colors can be edited by name and color.

- Click in the field to rename an alarm label.
- Click on a color swatch to open the Select Color window.
The alarm color can be changed by using the palette of basic colors, by selecting from the color picker, or entering specific numerical values. Any generated colors can be added to the custom colors palette.
Audible Alerts
Audible alerts can be assigned to alarm events by locating the desired .wav audio file. The Deadband (sound off) and Interval (sound on) periods can be set in milliseconds (ms) by entering values in the relevant boxes. Audible Alerts can be previewed by clicking the preview button.
Language
Import and assign language packs relevant to the country or base of operations. Language files must be the *.qm file type. L@ti-View will be supplied with a default language for the region or country of first use, and additional languages can be purchased on request. Contact the local distributor or sales person for more information.
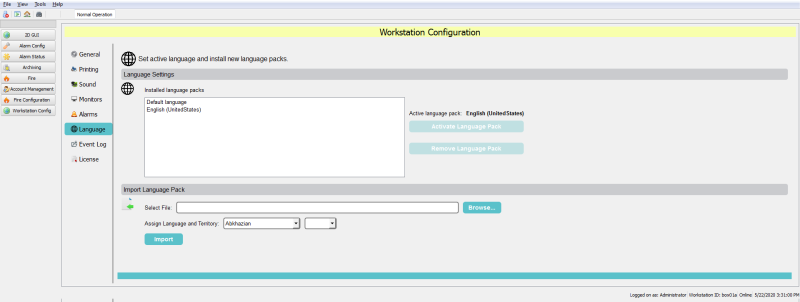
To import a language pack,
- Save the language pack file (*.qm) into the Languages folder in the chosen directory.
- From Workstation Config > Language, click Browse.
- Find and select the desired language pack file and click Open.
- Use the drop-down boxes to select the appropriate language and region.
- Click Import and follow the instructions for activating a language pack.
To activate a language pack,
- From Workstation Config > Language, confirm that the required language is installed.
- Select the desired language and click Activate Language Pack.
To remove a language pack,
NOTE The default language cannot be uninstalled.
- From Workstation Config > Language, select the desired language.
- Click Remove Language Pack.
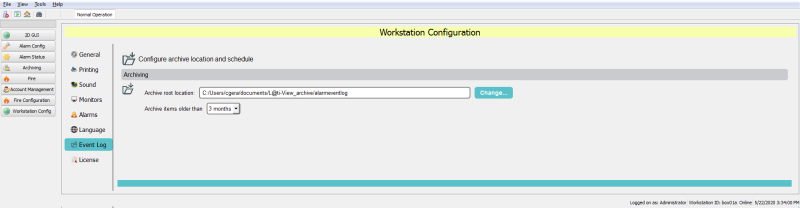
Event Log
The Event Log page is used to configure and schedule the archiving of events. By default, archive events are saved on the workstation, typically at: C:/users/<username>/documents/L@tiView_archive/alarmeventlog. If necessary, the archive location can be changed by clicking Change… and specifying another location.
Archive items are retained for the period specified, selected from the ‘Archive items older than’ option.
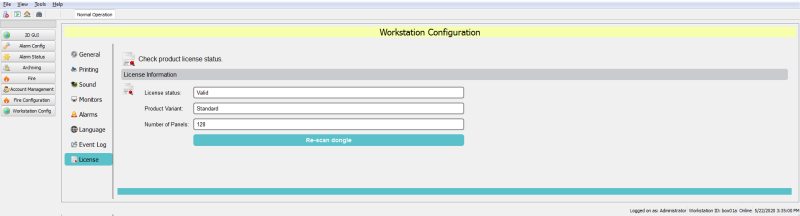
License
This page is used to check the dongle’s license details.
IMPORTANT! L@ti-View cannot be started without a valid dongle license.